အခုရှယ်ချင်တဲ့ အကြောင်းအရာလေးကတော့ NFS ရဲ့ အဆက်ဖြစ်တဲ့ Autofs server အကြောင်းလေး ဖြစ်ပါတယ်။ RHCE subject ထဲကတော့ မဟုတ်ပေမယ့် NFS နဲ့ ဆက်စပ်ပြီး သိထားသင့်တဲ့ topic လေးတစ်ခုဖြစ်လို့ မသုံးဖြစ်ရင်တောင် ဗဟုသုတအနေနဲ့ သိထားသင့်တယ်လို့ ထင်ပါတယ်။
ဝန်ခံရရင် ကိုယ်တိုင်လည်း ဒီစာကို ရေးခိုင်းတော့မှ လေ့လာဖြစ်တာမို့ ကိုယ့်အတွက်လည်း အများကြီး အကျိုးရှိခဲ့ပါတယ်။
Autofs ဆိုတာ automounter utility တစ်ခုဖြစ်ပြီးတော့ users programs တွေကနေ access လုပ်ဖို့ NFS mount point ပေါ်မှာ a file or directory တစ်ခု request လုုပ်တဲ့အချိန်မှာ automatically mount လုပ်ပေးလိုက်တဲ့ facility တစ်ခုဖြစ်ပါတယ်။
Autofs ကဆိုရင် လိုအပ်ချက်အရ automatically mount လုပ်ပေးသလို ကြိုပြီး သတ်မှတ်ထားတဲ့ အချိန် တစ်ခုအတွင်းမှာပဲ ပြန်ပြီး automatically unmount လုပ်သွားမှာဖြစ်ပါတယ်။
/etc/fstab ထဲမှာ mount လုပ်တာနဲ့ autofs ရဲ့ ကွာခြားချက်က ဘာလဲဆိုတော့ autofs က boot ပြန်တက်တဲ့ အချိန်တိုင်းမှာပဲ mount ပြန်လုပ်နေတာ မဟုတ်ပါဘူး။ /etc/fstab ထဲမှာ ဝင်ရေးပြီး auto mount လုပ်ထားတာဟာဆိုရင် boot တက်တိုင်းမှာ ပြန်စစ် နေမှာဖြစ်လို့ အကြောင်းတစ်ခုခုကြောင့် mount point ဟာ access လုပ်လို့မရတဲ့ အခြေအနေမျိုး ဖြစ်ခဲ့ရင် system startup မှာလည်း delay ဖြစ်စေနိုင်ပါတယ်။
Advantages of AutoFS
• AutoFS ရဲ့ အကျိုးကျေးဇူးတွေကတော့ user တစ်ယောက်က ဖိုင်တွေ folder တွေကို access လုပ်ဖို့ ကြိုးစားတဲ့ အချိန်မှာ Share ထားတဲ့ remote folder နဲ့ file တွေကို သတ်မှတ်ထားတဲ့ mount point အောက်မှာ အလိုလျောက် mount လုပ်ပေးလိုက်တာဖြစ်ပါတယ်။
• System Boot တက်တဲ့အချိန်မှာ mount လုပ်တာ မဟုတ်တဲ့အတွက် Booting time ကိုလည်း သိသိသာသာ လျှော့ချပေးပါတယ်။
• Active mount point အရေအတွက် လျော့နည်းသွားတဲ့အတွက် Network access နဲ့ efficiency လည်း တိုးတက်လာပါတယ်။
• Servers အများကြီးကို filesystem source အနေနဲ့ သတ်မှတ်ထားလို့ရတဲ့ အတွက် failed mount request တွေကိုလည်း လျှော့ချနိုင်ပါတယ်။
ဒီခေါင်းစဉ်မှာ NFS Share ကိုသုံးပြီးတော့ Autofs Configuration ဘယ်လိုလုပ်ရမလည်းဆိုတာ လေ့လာရမှာဖြစ်ပါတယ်။
NFS server အပိုင်းကို ဒီဘလော့မှာ ရေးထားပြီးဖြစ်နေလို့ ဒီခေါင်းစဉ်အောက်မှာထပ်မထည့်တော့ပါဘူးနော်။
ပထမပိုင်းမှာ ပြန်လေ့လာလို့ရပါတယ်။
Environment
Here are my demo nodes detail, I have both NFS server and client in RHEL 7.2 OS.
Operating System: Red Hat Enterprise Linux 7.x or CentOS 7.x
NFS Server Hostname: nfsserver.example.com
NFS Server IP Address: 10.5.7.12
Share Path: /nfsfileshare
NFS Client Hostname: nfsclient.example.com
NFS Client IP Address: 10.5.7.11
Autofs mount path: /mnt/nfsfileshare
Prerequisites
You need to have a working NFS server.
Autofs ကို nfsclient ဘက်မှာ install လုပ်ရမှာမို့ hostname နဲ့ IP ကို အရင် စစ်ပါမယ်။

Required Packages Installation
Package name: autofs
လိုအပ်တဲ့ autofs package ရှိမရှိကိုအရင်စစ်ပါမယ်။
# rpm –qa | grep -i autofs

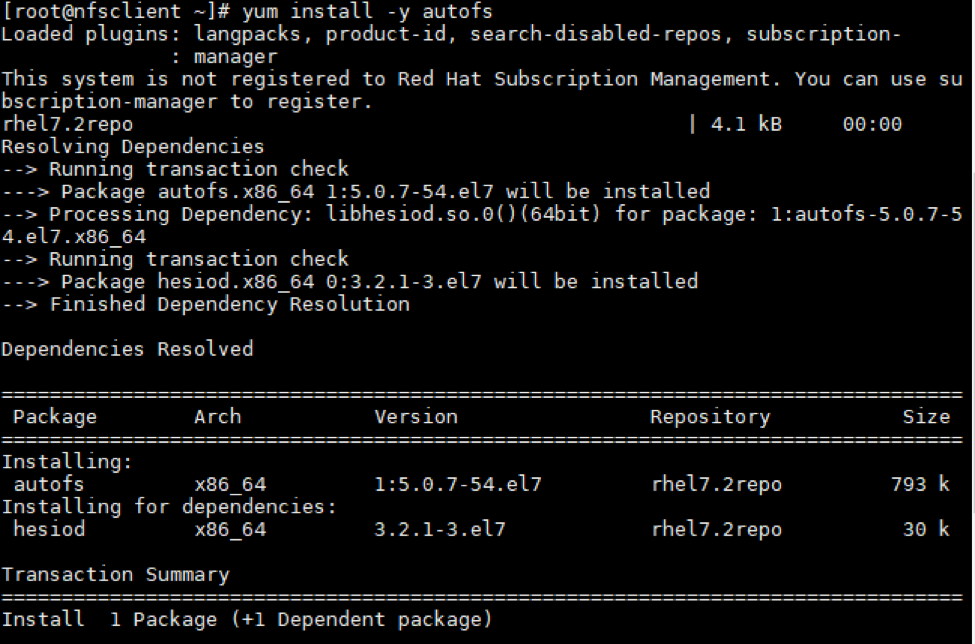
Autofs package မရှိတဲ့အတွက် install လုပ်ပါမယ်။

Autofs master map file Configuration
/etc/auto.master file ဟာ autofs ရဲ့ master map အနေနဲ့ အလုပ်လုပ်မှာဖြစ်လို့ သူ့ထဲမှာ ဝင်ပြင်ပါမယ်။
# vim /etc/auto.master

Shift + g နဲ့ ဖိုင်ရဲ့ အောက်ဆုံးကို သွားပြီး mount point info ကိုသွားရေးပါမယ်။
/mnt /etc/auto.fs --timeout=90
ပြီးရင် ဖိုင်ကို ပြန် save ခဲ့ပါမယ်။

/etc/auto.nfs file ကိုသွားမရေးခင်မှာ nfs server ကနေ share ထားတဲ့ mount point ကို အရင် စစ်ပါမယ်။
# showmount –e 10.5.7.12

ပြီးရင်တော့ /etc/auto.nfs file ထဲမှာ ဝင်ရေးပါမယ်။ ဒီဖိုင်က မရှိတဲ့ အတွက် create လုပ်ပေးရမှာဖြစ်ပါတယ်။
ဒီနေရာမှာ /etc/auto.nfs file ထဲမှာရေးရမယ့်ထဲက mount point က မရှိသေးဘူးဆိုရင် အဲ့ဒီ folder ကိုအရင် create လုပ်ပေးရပါမယ်။
Auto.master file ထဲမှာ /mnt အောက်မှာလို့ ညွှန်းခဲ့တဲ့အတွက် nfsfileshare ဆိုတဲ့ folder ကို /mnt အောက်မှာ ဆောက်ပေးပါမယ်။

Nfsfileshare folder လည်းဆောက်ပြီးပြီဖြစ်လို့ /etc/auto.nfs ထဲမှာဝင်ရေးပါမယ်။

Save and exit the file.
Where,
♣ nfsfileshare is a mount point.
♣ -fstype=nfs is the file system type & ‘rw,soft,intr’ are mount options.
♣ ’10.5.7.12:/nfsfileshare’ is nfs share location.
Autofs service ကို enable လုပ်ခဲ့ပြီး start လုပ်ပါမယ်။ status နဲ့ပြန်ကြည့်လို့ရပါတယ်။
# systemctl enable autofs.service
# systemctl start autofs.service
# systemctl status autofs –l

Autofs service start လုပ်ပြီးဖြစ်လို့ mount point အောက်မှာ ရှယ်ထားတဲ့ နေရာကို ဝင်ပြီး access လုပ် ကြည့်ပါမယ်။
# cd /mnt/nfsfileshare ; ls

# df –hT
Command နဲ့ mount point ကို ပြန်ကြည့်ပါမယ်။

Debugging and Troubleshooting AutoFS
# vim /etc/sysconfig/autofs
File ထဲမှာ အောက်မှာပေးထားတဲ့အတိုင်းဝင်ရေးပါမယ်။
LOGGING=”debug”

Autofs service ကို restart လုပ်ပြီး ပြန်ကြည့်လိုက်မယ်ဆိုရင် /var/log/messages အောက်မှာ automount နဲ့ပက်သက်တဲ့ detail log တွေကို မြင်ရပါလိမ့်မယ်။

Thanks for your time and enjoy Learning !!!!!!!
Please also Like and Follow Root Of Info Page
0 comments:
Post a Comment
Note: Only a member of this blog may post a comment.